I can
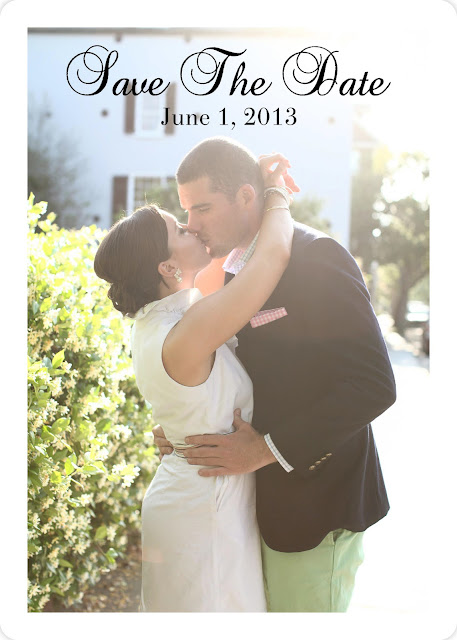
finally share with you all our Save The Dates! I ordered them from
Minted.com months ago, and have been waiting until after the holidays to send them out. After several hours of assembling and addressing, they are all out in the mail, so now it is safe to post! I ended up having Minted do a custom order for me. There was a holiday card that I wanted to use as the template because it allowed me to do the photo grid on the background as well as add rounded coroners (shapes weren't yet available on the wedding products).
Customer service was so helpful and got me all set up! I basically just contacted them, told them I wanted to use the "Be Joyful" photo card (because I liked the old-time photo feel that the white border added) and wanted to use it as a save the date. They added the order to my cart and from there I could customize it how I wanted. They also removed the logo from the back, because you don't want a logo on your STDs.
{website has been removed because it contains personal info}
I absolutely
LOVE how they turned out!! Any of Minted's designs are customizable, don't hesitate to ask if they can do something and don't feel like you have to use a design within a certain category. I will note that I uploaded the front picture with the font already on there. I downloaded a font from the internet and added it to the picture in photoshop. But, Minted has
100s of fonts to choose from, so this really wasn't necessary.
In order to add a bit of our main wedding color (pale blue) to the Save the Dates, I decided to add the
"modern swag" slip-in envelope liner to the envelopes. These are DIY, and kind of time consuming, but I love the end result. It definitely adds a little something extra to the overall feel.
Rather than having the return address printed on the back, I ordered
this embossing stamp from Neiman Marcus. I figured I could use it on the wedding invitations as well. I chose to leave the name off and only include the 2 lines of the address (I read somewhere this was proper?!). For $24, I'm really happy with that purchase...plus it will get use all the time, not just wedding related things.
And finally, I am no calligrapher, but I addressed the envelopes by hand. This took a very long time. They didn't turn out perfect, and some were better than others. I free handed them, but used a scripty font as inspiration. I downloaded
"Pea NJH Script" (love all their hand writing fonts!) and copied all the names from our invitation list to a word doc in that font and used it as a guide. I'd suggest writing it in pencil or thin black ink and then going over that with a sharpie marker to give you a more defined line.
That's it! I sent them off into the world...they are either in the hands of their recipients or on their way there. Mark that off the list!


